How Can We Help?
ProofPoint Essentials (PPE) – Usage guide
The Basics
What is Proofpoint Essentials?
The Proofpoint Essentials service is a message filtering service that provides real-time spam and virus filtering, attack blocking, and email-traffic monitoring. Users receive comprehensive protection against unwanted and malicious email. The service blocks a wide range of email attacks at the connection level, filters spam and viruses, and can approve or block messages based on sender address or domain, origin IP address, attachment size or file type, text content, and more.
Incoming user email is processed at our highly secure and reliable data centre before reaching your messaging environment. Within seconds, spam and viruses are separated from legitimate messages. Legitimate messages are delivered to recipients with minimal delay, while suspicious messages are deleted, or sent to a quarantine area where you have the option to review or release them.
First Steps
You will receive a mail (see the image below as example).

Please configure a password.
Office 365 customers do not need to set up a password as you can use your Office 365 credentials to log in
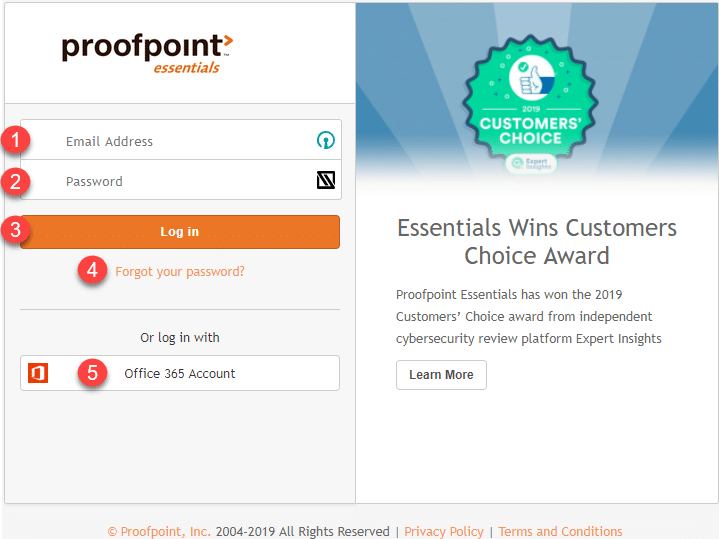
Logging in
- Browse to the following link.
- Type in your primary e-mail address and password
- Click on Log In
If you have forgotten your password, or do not know what it is, click on the “Forgot your password?” link as indicated by the number 4 in the screenshot. This will require you to enter your e-mail address, where after you will receive a link in your inbox. Click on the link and follow the on screen instructions to reset your password.
Choose a password that is easy to remember – you can use the same password that you use to login to your computer. Note: Changing your Proofpoint password does not affect your e-mail or computer password and vice versa. Passwords must be a minimum of 8 characters, contain at least 1 number, 1 special character and be a combination of upper and lowercase letters. Office 365 customers can also click on the “Office 365 Account” button to log in using their Office 365 credentials as indicated by number 5 in the screenshot.
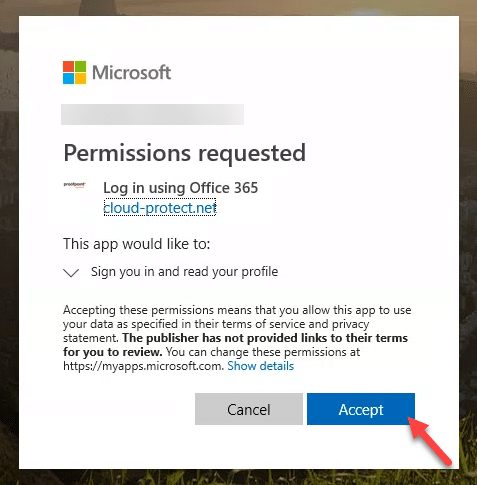
Logging in using Office 365
Only valid for customers with Office 365 accounts.
The first time you click on the button to login with Office 365 (number 5 in the previous section), you need to authorize cloud-protect.net. This is a once-off process.
Additional details
Overview of the interface
Access your Emergency Inbox
In case your corporate e-mail server (Exchange server) is down, you can use the emergency inbox to view messages that have not been delivered to your inbox yet. From here you can also reply to messages or send new messages.
Search your email logs
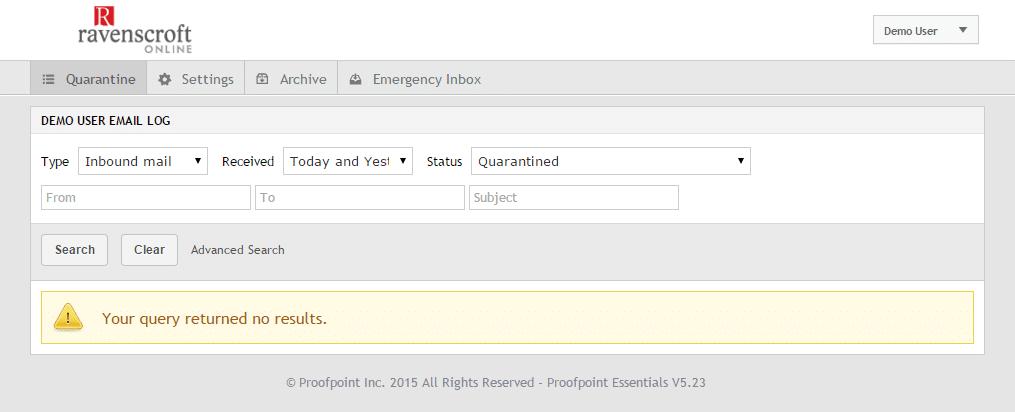
When you first log in to the system it will direct you to the “Quarantine” section from where you can view your e-mail logs and search for Quarantined messages. You can also view e-mail logs for messages that have been delivered and optionally report spam.
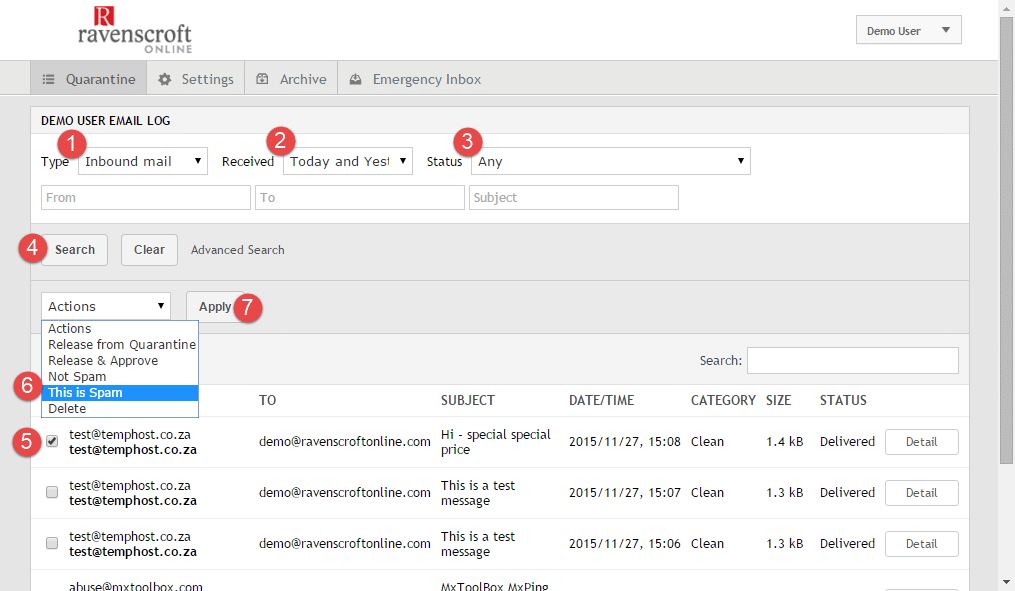
Reporting a message as SPAM
With reference to the above screenshot, messages can be reported as SPAM by logging into the system.
- Choose Inbound mail
- Select the date range
- Change the status to any
- Click on search
- Select the message or messages you wish to report as SPAM
- From the actions menu choose “This is SPAM”
- Click on apply
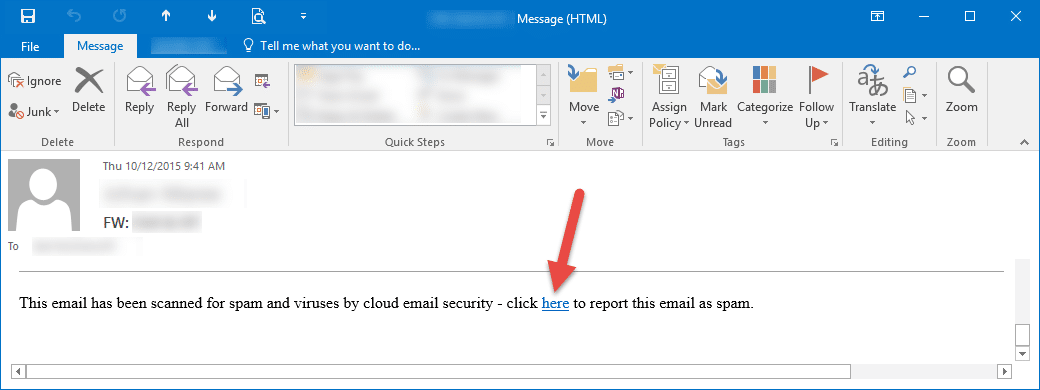
At the bottom of a received message there is also a link that you can click on to report SPAM:
“This email has been scanned for spam and viruses by cloud email security – click here to report this email as spam.
View your Quarantine (Digest)
A summary of messages that have been blocked as SPAM will be emailed to you daily – this is called a message digest.
From the message digest, you have the option of releasing emails from quarantine. You can also “release and approve” messages, so that future messages from that sender will not be blocked and quarantined.
- Click on the link “sign in to your account” to access the ProofPoint user interface
- Click on “release” to deliver the message. Click on “release and approve” to deliver the message and mark future messages from the same sender as approved.
- Click on “Request new digest” to receive an updated message digest (quarantine summary) in your inbox
- You can also change the frequency of how often you receive a digest in your inbox.
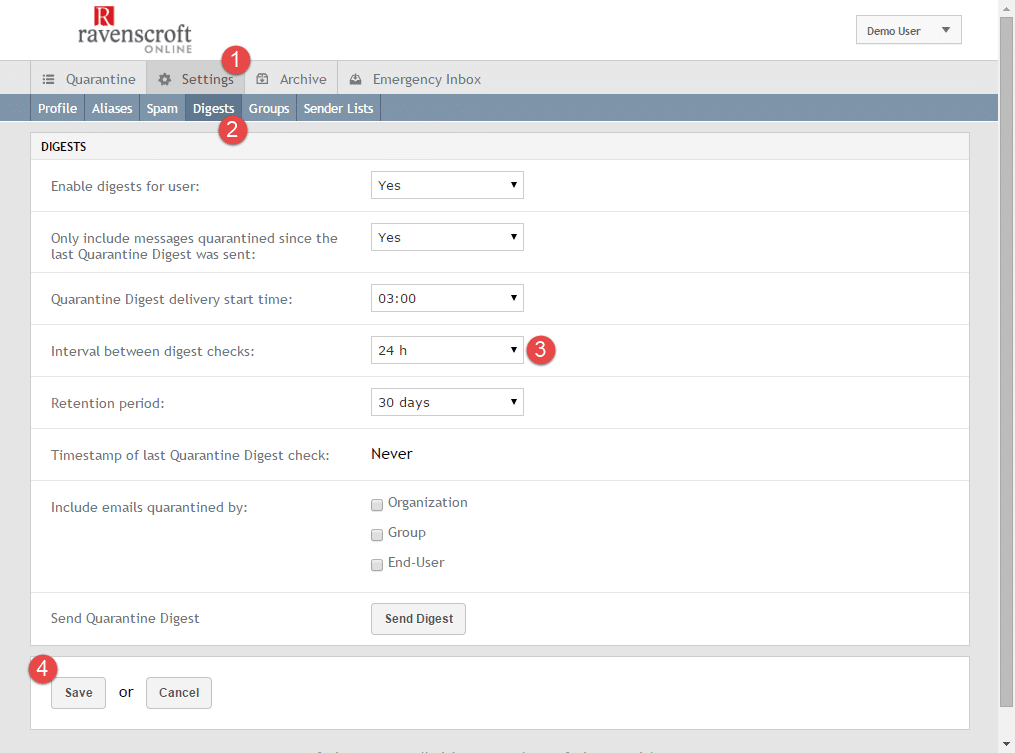
Log in to the user interface, then select Settings, Digests. Change the interval and click save.
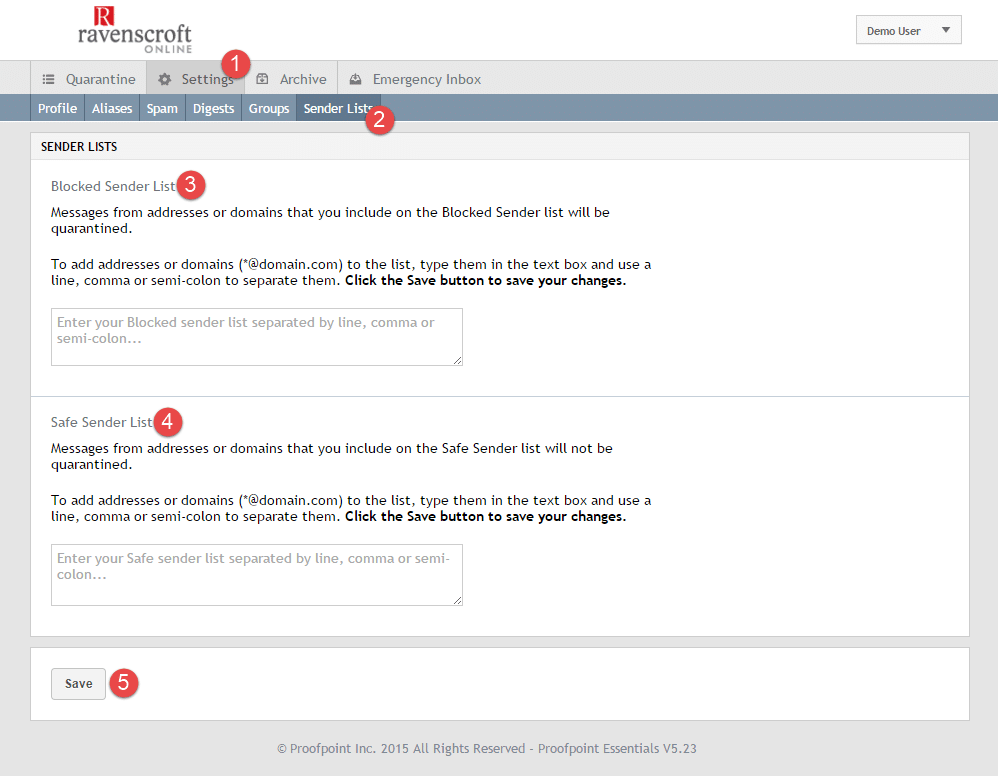
Manage sender lists (approve/block senders)
You can also manage your sender lists to approve and / or block senders from the user interface.
Ensure you are logged in then follow these steps:
- Click on settings
- Select Sender Lists
- Update your blocked senders
- Update your Safe Senders (approved senders)
- Click on save
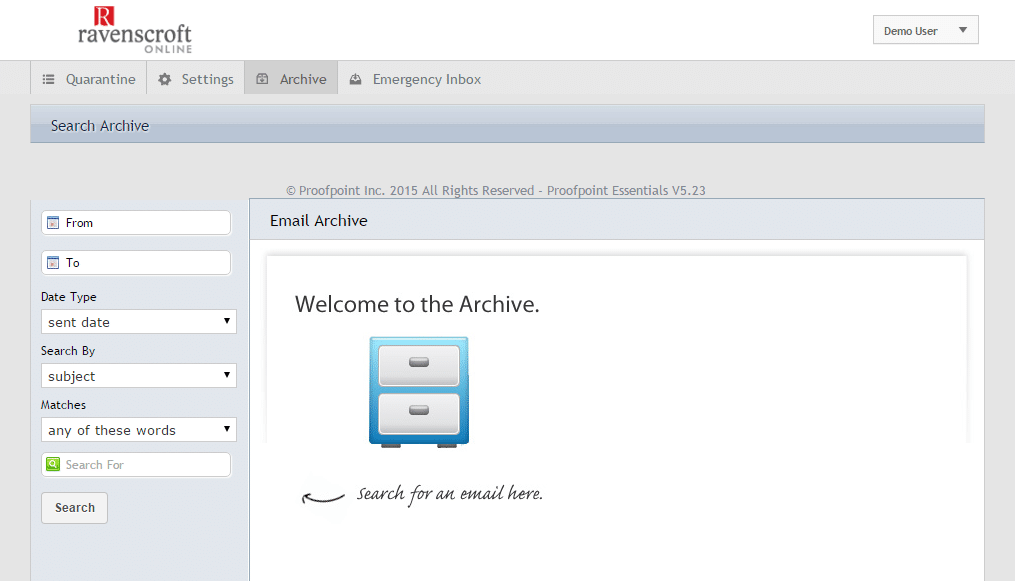
Viewing / accessing your archive
Note: Archiving is only available to users with ProofPoint Essentials Professional licenses. Click on the archive tab to search your message archive.
Complete End-User Guide (PDF)
For a full guide, please view the PDF user guide. You can also download this to your computer.